How to work with your Navigation and Menu’s
Digital PTO handles Navigational Menu’s in Two different ways. It all depends on the theme you select. Some of our more basic themes will create the navigation for you. While this is nice, it gives you no control over the naming, order and flow.
Some of our more advanced themes (including all of the Starter Themes) use a MENU MANAGER. The Menu Manager is what we will be explaining here. If you do not have access to the MENU MANAGER in your theme selection, this will not apply to you. We will show you how to verify if your theme uses the MENU MANAGER below.
 Don’t Forget to Save your Work
Please remember to SAVE or UPDATE any changes you make or they will be lost! These blue buttons are typically found toward the top right of a page you are editing.
Note: You will need to be logged in to Edit your site.
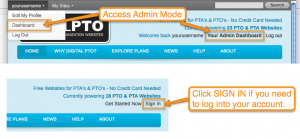 Please be sure you have logged into your account before trying to make edits to your website. Edits are performed in the Admin Section of your website. There are a number of ways to access your websites Dashboard (Admin Home Page). The easiest way is to hover over your username in the top bar and them click on DASHBOARD.
Step 1: Access the MENU Manager
 From the Dashboard of your Admin Area, click on the triangle next to APPEARANCE if it is not already expanded and then click MENUS.
Step 2: Verify Your Theme supports MENU Manager
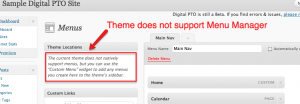
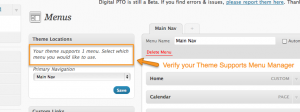 Check the text under Theme Locations to verify that your theme supports using the Menu Manager. The image below is an example of a theme that does not support the Menu Manager.
Step 3: Understanding Menu Structure
 Above you will see your websites navigation in the Admin Side of things. Notice there are five Grey Bars to the far left and two (Under PTO Info) that are indented to the right. These two menu items are Sub Pages of PTO Info and in some themes these items will appear as a “drop down” list below the main menu.
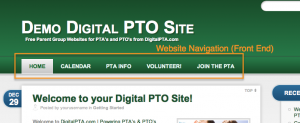
Below, you can see the Live View of the same menu structure you have seen above.
Step 4: Moving Items Around
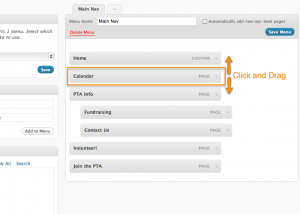 If you would like to change the order of your Menu, or move an item from a Parent Page to a Sub Page, simple click on the grey bar you want to move and drag it to its new location. It is extremely easy to move menu items around with one click.
Step 5: Edit Menu Items & Delete Menu Items
 Clicking the triangle to the right of any Menu Item will expand the options and allow you to make changes. NAVIGATION LEVEL is the text you want displayed in your Menu (regardless of the Page’s name). ORIGINAL is the name of the Page you are linking to. REMOVE will delete that particular menu item from the list.
Step 6: Adding New Menu Items
 To add a new Menu Item from your list of Pages, click the Page you wish to add and click ADD TO MENU. If the page you are looking for is not on the “Most Recent” list, click the VIEW ALL or SEARCH tab to locate the desired Page. Once you click ADD TO MENU, the new Menu item will appear at the bottom of the list. Click and Drag it to the location you would prefer.
Step 7: Creating Custom Menu Items
 Occasionally you may want to create Menu Items that do not link to your website. These links can lead to other websites. For example, a PTA group may want to link to the National PTA in their navigation menu. To add a CUSTOM LINK, enter the URL (website address) and the LABEL (text you want for the link) and then click ADD TO MENU.
Step 8: IMPORTANT! Don’t forget to SAVE!
 Someday in the future, your website might just “know” you want to save your work and take care of that for you. In the mean time though… please don’t forget to save your menu changes before you head off to another project. If you forget to save your changes they will be lost after you leave the page.


 Are you a Premium Plan member yet? It might be time to get started.



 Need More?
