
Uploading Images to your Digital PTO Website
Image are EXTREMELY IMPORTANT when it comes to the succes of a Parent Group website. Our two years of testing have shown that sites with images have 25% more consistent traffic and almost double the amount of time spent on the site by a visitor. Adding images to your Digital PTO website is easy and we highly encourage you to use images in as many News Posts as possible for the best results.
A few things to keep in mind
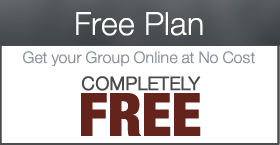
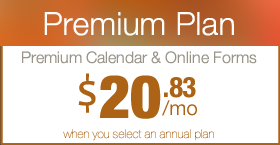
Our free plans come with limited storage space. If you plan on uploading quite a few documents and or images to your Digital PTO site we would highly suggest upgrading to a Premium Plan. Document uploads are limited to either .pdf of .doc formats only and Digital PTO supports most popular image formats. Individual Files sizes are limited to 15 MB.
 Don’t Forget to Save your WorkPlease remember to SAVE or UPDATE any changes you make or they will be lost! These blue buttons are typically found toward the top right of a page you are editing.
Note: You will need to be logged in to Edit your site.
 Please be sure you have logged into your account before trying to make edits to your website. Edits are performed in the Admin Section of your website. There are a number of ways to access your websites Dashboard (Admin Home Page). The easiest way is to hover over your username in the top bar and them click on DASHBOARD.
If you want to add images to your news posts on the front page of your site, use the featured image instructions below. If you want to add an image directly inside your post or page’s content, use the steps found below the featured image information.
Add a Featured Image
 Adding a Featured Image is really easy. This will add a small image next to the news posts on your home page. It is a perfect way to grab attention to your news and information. Click the SET FEATURED IMAGE link to open up the image selection window.

Click SELECT FILES to find the files you want to upload from your computer. Once you open the file, the website will immediately begin to upload your image.

Scroll to the bottom of the image information after it uploads and click the USE AS FEATURED IMAGE link. After you have clicked that you can click anywhere in the grey area or click SAVE ALL CHANGES.

Click the “X” in the top right corner to close the image upload window.

Don’t forget to PUBLISH when you are ready to save your work!
Step 1: Select the Page or Post you want to add an image to
 Adding a image is the same whether you are using a News Post or an Informational Page. We will be using a News Post for this sample. Once you have the list of Posts available, click the Title of the Post you want to add the image to. If you are creating a new post, go ahead and start a new News Post and move to the next step.
Step 2: Specify where you want to Add the Image
 Once you have a Post or Page opened, click within the body of the text to create a spot to insert the image.
Step 3: Click the Upload Button (looks like a square)
 Now click the Upload button (looks like a square in a square) next to Upload / Insert
Step 4: Select the Image you want to Upload
 Once the pop-up window loads, click SELECT FILES to upload an image from your computer. Further below we will explain the additional options on this screen.
Step 5: Give you new Image a link (or not)
 Once the file has uploaded, you will be presented with a variety of options for the link assigned to your image. If you would like your image to link to the larger version of your image (enlarge) click the FILE URL button. You can also link to the News Post (POST URL) or remove the link completely (NONE).
Step 6: Pick a Size and Alignment for your Image
 More than likely the image you uploaded is way too large for the page you are working on. Not to worry, Digital PTO can take care of that for you. We provide you with up to 4 different size options (depending on the original image uploaded) to select from. Typically we suggest either THUMBNAIL or MEDIUM sized images. You can also specify if you want the image to align tot he left, center or right.
Step 7: Insert the Image into your Page
 Once you have selected your sizes, etc you can click INSERT INTO POST and the image will be placed exactly where you clicked earlier.
Step 8: Review your Image and Publish
 If you are satisfied with your image placement go ahead and PUBLISH or UPDATE your page. Congrats. You just added an image.
Tips: Editing an image already inserted
 If you need to make an image a little bit smaller or change the Link assigned to an image, click on it once and then click the Mountain Icon and you will be presented with options. TIP: We find it easier to REMOVE the image and then re-insert rather than using this option too frequently.
Tips: Removing an Image
Once you have selected your sizes, etc you can click INSERT INTO POST and the image will be placed exactly where you clicked earlier. If you need to make any changes to your image after it has been placed you can click on it once to bring up the option to either edit it (Mountain picture) or Remove it (Delete icon). Note that REMOVING the image does not delete the file, it only removes it from this page. You do not need to re-upload the file if it’s already been uploaded.
Tips: Using Featured Images
 Some of our more advanced theme options (especially in the premium themes!) utilize a function called FEATURED IMAGE. We are not going to explain this specific feature in this tutorial, but we wanted to point it out in the event your theme has the USE AS FEATURED IMAGE link when you are uploading. If you have this option, try clicking on it and publishing your post. Im many cases that it all you will need to do to use the option. Take a look at your published site to review the placement and functionality built in.
Tips: Editing Images without buying Photoshop
 If you would like to crop some of your photos (especially ones straight from a digital camera) and do not have photoshop or other software to edit your pictures, we are fans of using Picnik.com. They offer free photo editing online that you can do in just a few clicks and save. Please note that Digital PTO does not provide user support for Picnik.com but does endorse their service.
Tips: Using an Image URL instead of uploading
 If you have an image already uploaded somewhere else online (your own site, flickr, etc) you can link to that photo instead of uploading it. Please see the graphic above to explain the process. Please Note: You are not able to re-size images that are not uploaded directly to your Digital PTO website so they must be the correct size before inserting. To access this functionality click the FROM URL tab when uploading an image.
Tips: Using an image already uploaded to your website
 Quite frequently you may wish to re-use an image that you have already uploaded previously on a different part of your website. Or you may simply need to re-insert an image that you added to the wrong place accidentally. In these cases, you do not need to upload the image again. It’s already safely stored on your website. To access these stored images click the MEDIA LIBRARY tab after you open the INSERT IMAGE dialogue. The Media Library will list all of the images you have previously uploaded, starting with the most recent. When you find the image you want to use, click SHOW next to the image and you will be presented with the options you are already familiar with to add the image, etc.
 Are you a Premium Plan member yet? It might be time to get started.


 Need More?