How to set up recurring payments on your forms
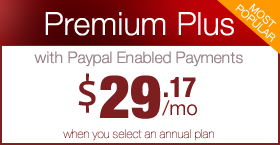
Premium Plus Paypal Members have the ability to add Paypal Payments to your online forms. They also have the ability to set up recurring payments via any Paypal account. This tutorial will explain how to set up a quick monthly recurring payment form. Please note that users who sign up for recurring payments must have (or sign up for) a Paypal account to take advantage of this feature.
IMPORTANT: This tutorial assumes that you have already completed the initial Paypal setup with your site. If you need assistance setting up your Paypal settings, please visit THIS TUTORIAL. Additionally, this tutorial assumes you know the basic usage of our form system. If you need instruction on using the forms, please visit THIS TUTORIAL.
Step 1: Select a Form or Create a New One
 The first thing we need to do is set up a new form, or pick a form to use for our recurring donations. In this example, we are going to set up a new form.
Step 2: Give your Form a Title and Description
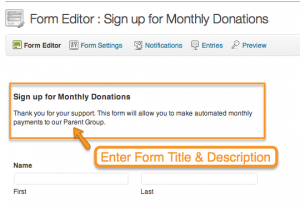 Click on UNTITLED FORM field and add a form title and description.
Step 3: Add Required Fields
 Now you will want to add the necessary fields to capture your users information. Click on the ADvANCED FIELDS tab on the right and add a NAME field, ADDRESS field and EMAIL field. You can always add additional fields, but these are the minimum required fields.
Step 4: Add a Product Field
 Now we need to add our recurring payment product. Click on the PRICING FIELDS tab on the right and then click on PRODUCT. This will add a basic product field to the end of your form.
Step 5: Define your Pricing Levels
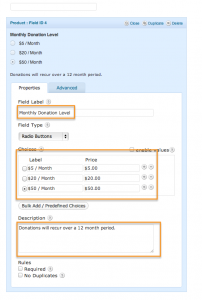 There are a variety of ways to present your recurring donations, but we prefer using Radio Buttons. Let’s first enter the Field Label, in our example we used “Monthly Donation level”. Now select RADIO BUTTONS from the field type Drop Down menu. Enter the monthly donation levels you wish to offer and a DESCRIPTION if you wish to provide more information to your subscribers. When you are finished click UPDATE (or SAVE) FORM.
Step 6: Create New Paypal Connection
 Once your form is completed and saved, click on the PAYPAL link under the FORMS menu and then click ADD NEW to create a new Paypal Connection.
Step 7: Enter your Paypal Email Address
 Enter your groups Paypal email address and select PRODUCTION for the Mode.
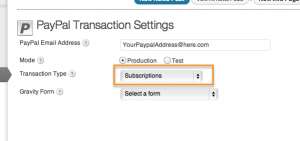
Step 8: Select SUBSCRIPTIONS Transaction Type
Step 9: Select Recurring Payment Form
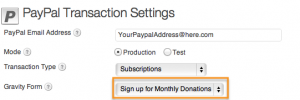 Under Gravity Form, select the form you created for recurring subscriptions.
Step 10: Specify your Recurring Details
 Under Recurring Amount Drop Down, select the field you created to specify the donation amount. Ours was called Monthly Donation Level. Then select the Billing Cycle. Most common is every 1 month. Finally Select the Recurring Times. Most schools offer either 12 month or 8 month recurrences, but this is completely up to you.
Step 11: Map your Form Fields to Paypal Fields
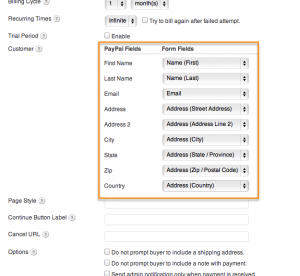 If your form looks like our example form, you have already asked your subscriber for their information, so we now want to connect that to Paypal so they don’t have to type it again. Map all the available fields to the fields that match up on your form.
Step 12: Finalize your settings & Save
 Customize any of the additional fields as necessary and then be sure to click the SAVE button.
Step 13: Test it out!
 Head over to your form on the live site (need help adding it? Click here) and make sure that everything is working properly. Now you are all set up to start accepting monthly donations on your website.




 Need More Help?
