

How to Edit and Work With Wufoo Forms
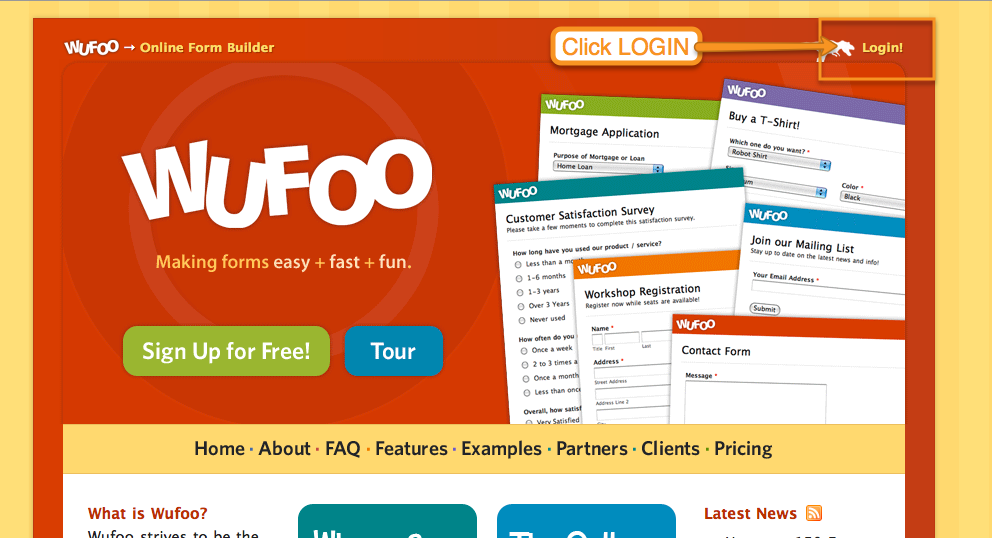
Digital PTO spent a lot of time selecting the service we felt best complimented our websites and functionality when it came to selecting Wufoo to be our preferred Credit Card Processing Form Service. We found Wufoo to be extremely intuitive and simple to use as well as very reliable. This tutorial covers how to edit and change your existing Wufoo Family Registration Forms.
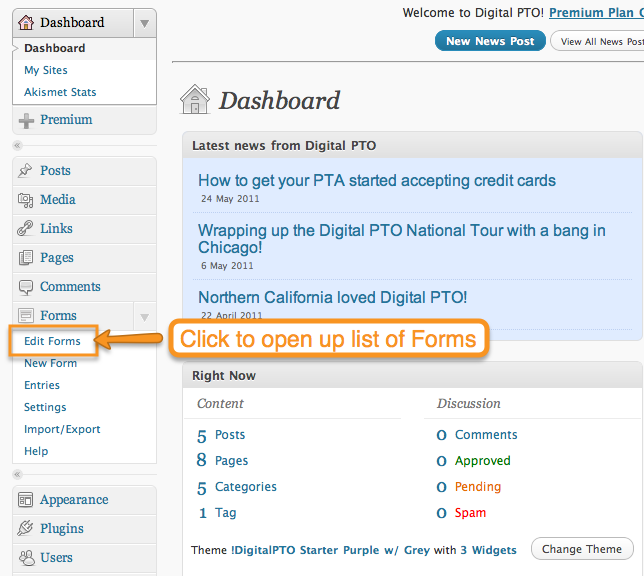
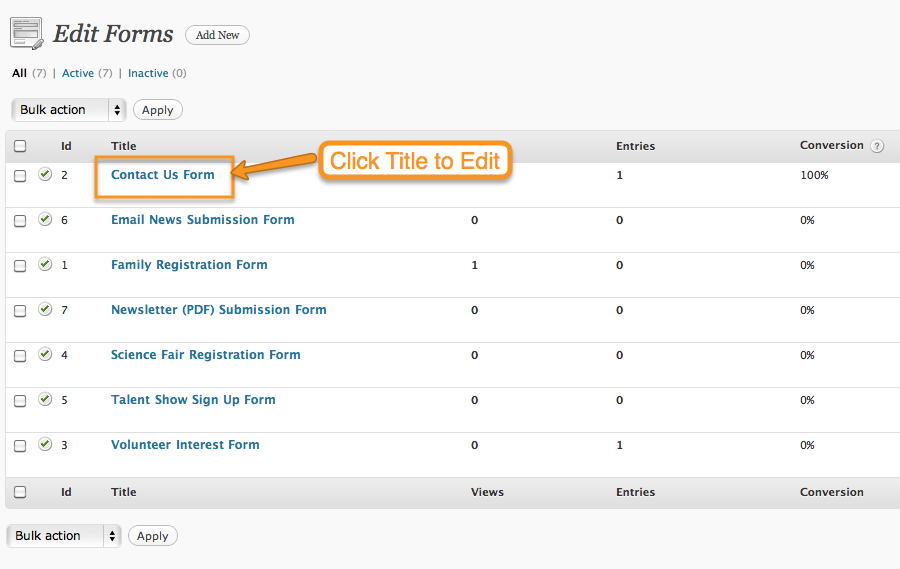
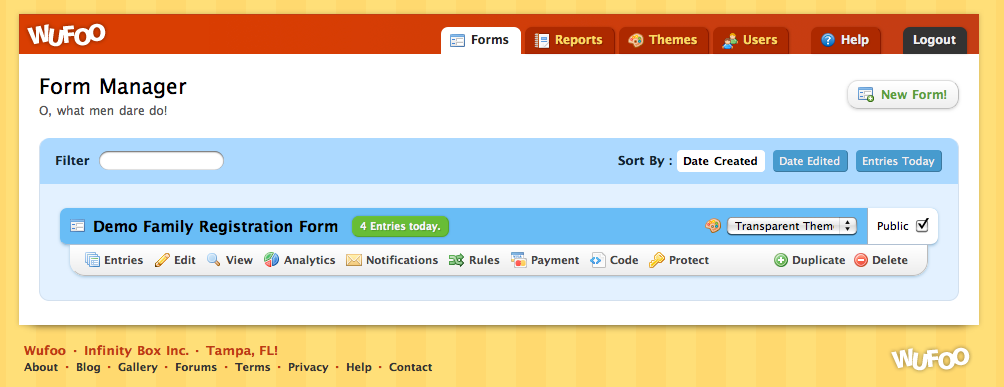
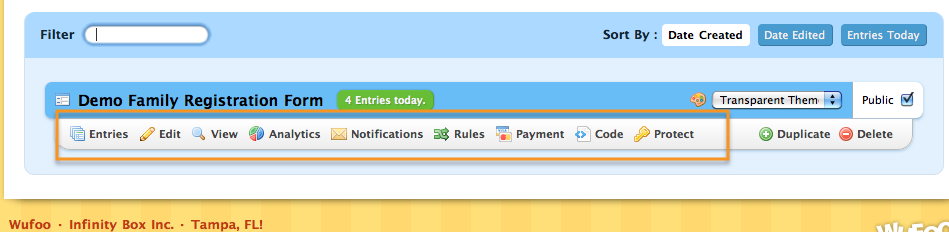
Step 1: Click EDIT on the form you wish to Edit
 Hover over the form you wish to work with and click the EDIT option.
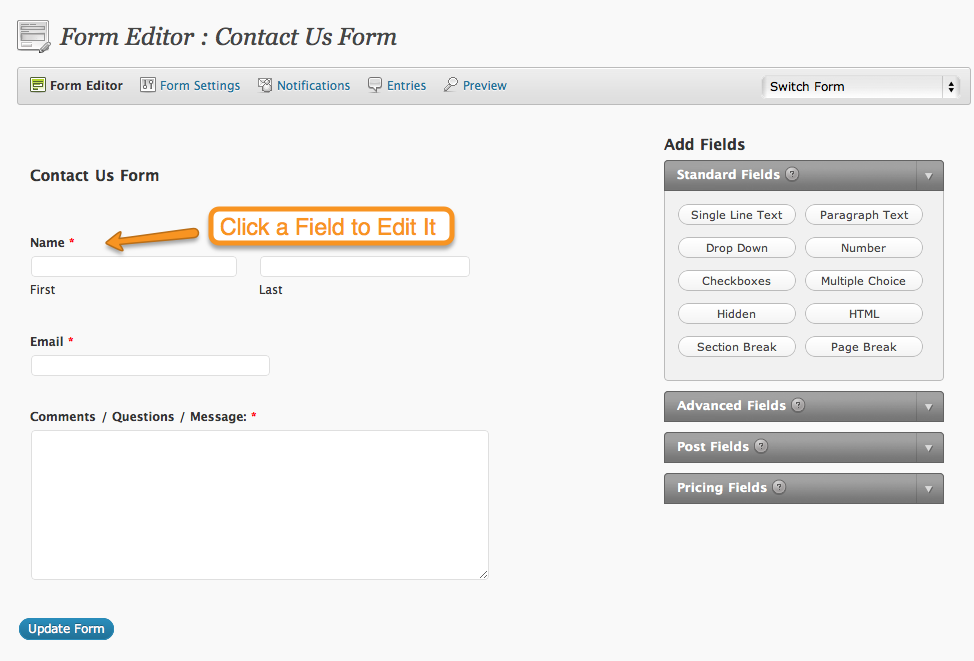
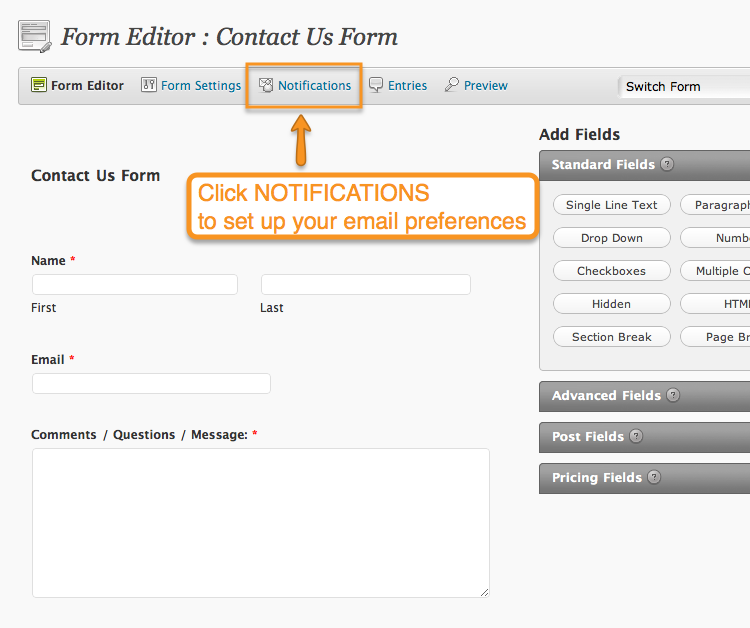
Step 2: Understanding the Edit Screen
 The main form editing screen is divided into two parts. The Left side of the screen is where you will edit individual fields, add new fields and adjust the form settings. The Right Side of the screen is a preview of your form as well as where you can arrange the fields, delete fields and more.
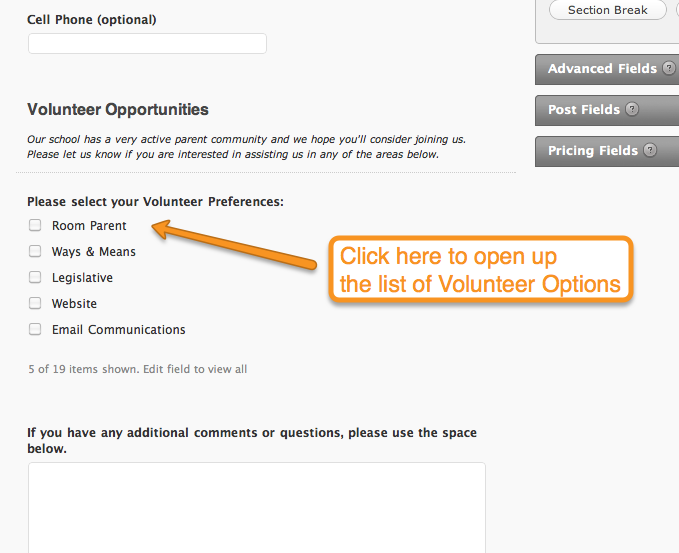
Step 3: The Add a Field Tab

The default left tab when you open a form is the ADD A FIELD tab. This tab allows you to drag new form fields into your form. To add any of the available fields, click on the field and DRAG it over to your form. Place the field where you want it by letting go of your mouse click.
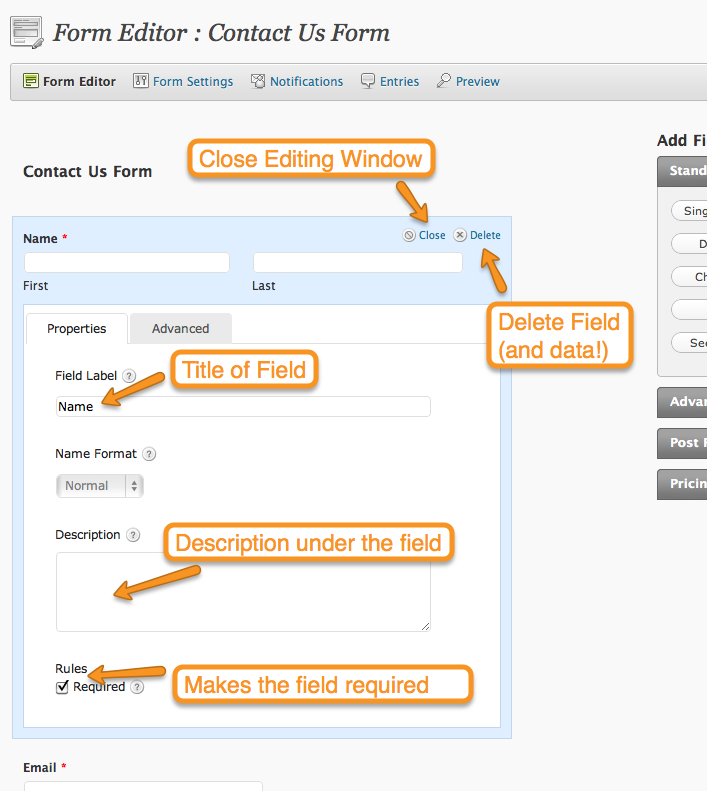
Step 4: The Field Settings Tab
 The FIELD SETTINGS tab will be displayed anytime you click on a specific form field. In the example above, we have clicked on the Phone number field and now the FIELD SETTINGS is displaying our available options.
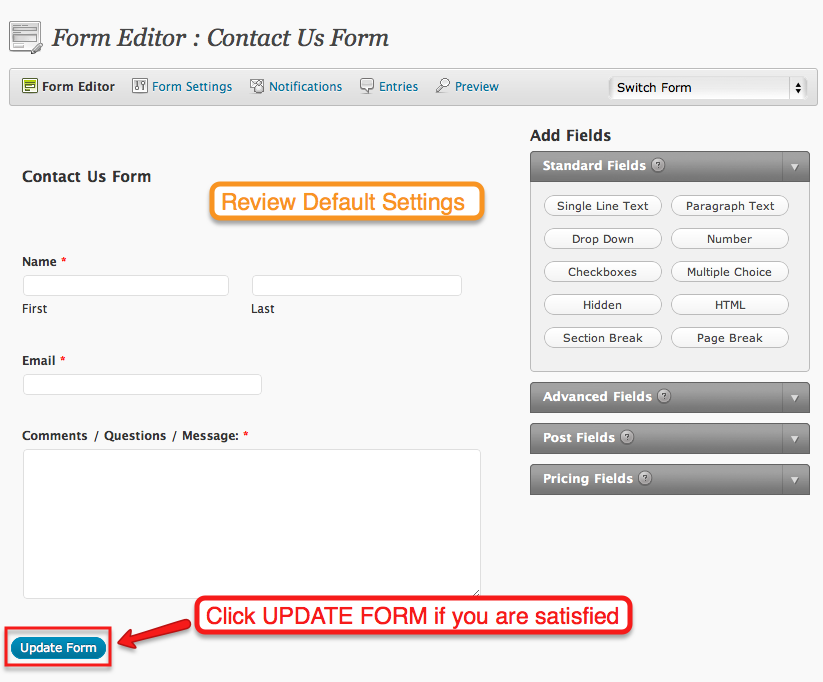
Step 5: The Form Settings Tab
 The final tab on the Left Side is the FORM SETTINGS tab. This is where you can change the name of your form (please leave your school name in the form so we can identify it) as well as where you can change the confirmation messages (on screen) and the confirmation email messages.
Step 6: How to move Fields around
 If you would like to change the arrangement of your individual fields, you can quickly click on a field, drag it to a new location and release your mouse. It’s very simple.
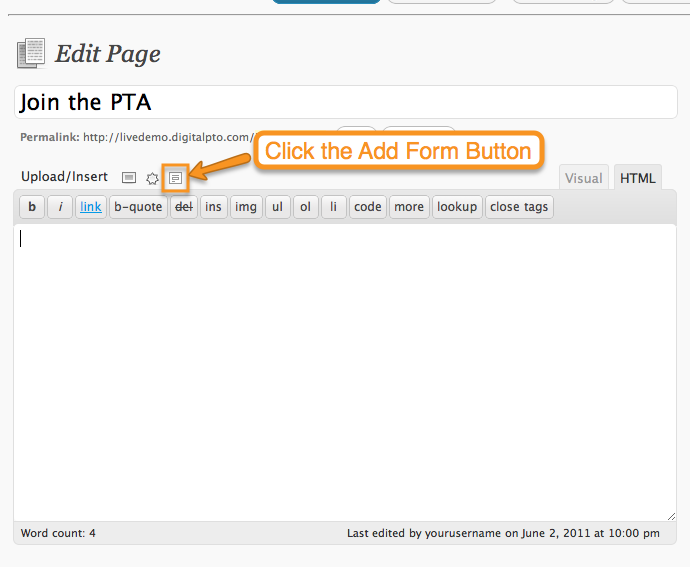
Step 7: How to Add a New Field
 To add a new field, be sure you can see the ADD A FIELD tab with the field options. If you can not see that tab, click the tab, or click the ADD FIELD button at the bottom of the page. Once you know what kind of field you want to add, click (and hold down) on the field, and drag it over to the form designer on the right side of the screen. Once you have found the location you wish to add the field to, release your mouse and the field will be added.
Step 8: How to Copy/Duplicate a Field
 If you would like to save some time and make a copy / duplicate of a field you have already created (a drop down of grade levels for example) you can do that by clicking on the field on the right screen and then by clicking the small green plus mark in the circle. This will make a duplicate of the field directly below the current field. You can than edit the field it created to suit your needs.
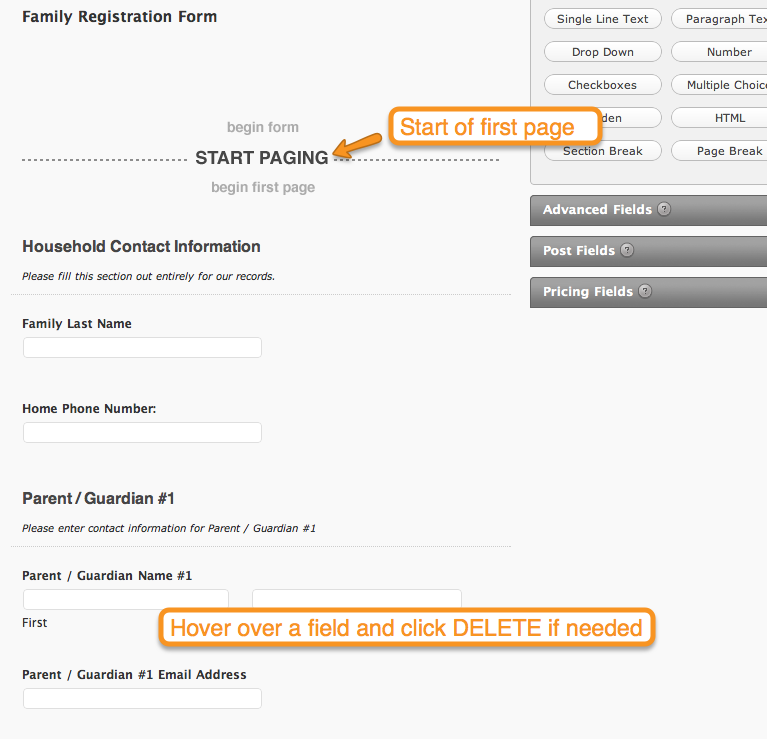
Step 9: How to Delete a Field
 If you would like to delete an individual field, click on the field in the right side screen and you will see an option to DELETE the field. It’s a RED minus sign. Click that to delete the field. WARNING! This will also delete any data that has been submitted in this field, so if you are deleting something off of a live form, you will be deleting the data form that form as well. Delete with caution.


 Need More Help?


