How to create a gallery of images on your website
An Image Gallery is a really great way to showcase some of the work that your Parent Teacher Group has accomplished. Carnivals, Activities, School Purchases, etc. Promote your group to your community and help them understand why they should get involved financially and with time.
This tutorial will explain the simple steps to create a dynamic image gallery.
Step 1: Create a News Post or Info Page
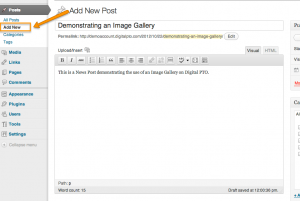 The first thing you’ll need to do is create a News Post or an Info Page where your Image Gallery will live. Enter all of the usual info, Title, Content, Categories, etc.
Step 2: Open the Media Upload Option
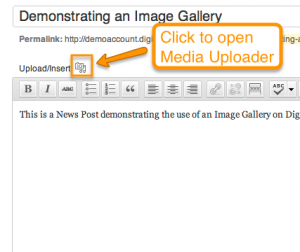 When you are ready to insert your Gallery, position your cursor on your new page where you want to add the Gallery and then click the Upload/Insert Media Icon top open up the Media Uploader.
Step 3: Add the Images you want in your Gallery
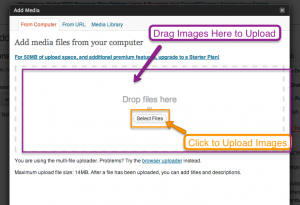 There are a number of ways to add images to your website. If you have the images you want to add to your site in their own folder, you can open that folder on your computers desktop, select ALL of the files and drag them over to the Media Upload window and they will be instantly uploaded. If you would rather select your files the standard way, click the SELECT FILES button and upload away. Continue to upload all the images you want to use. Do NOT click SAVE ALL CHANGES
Step 4: Set up Gallery Settings
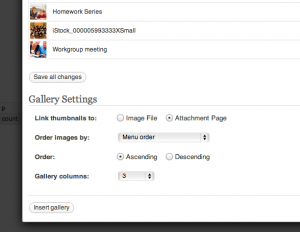 After you have finished uploading images, scroll to the bottom of the pop-up window and you will see the Gallery Settings. Note: If you have closed your image upload window, you can return to these settings by clicking on the Image Uploader Icon again, then click the GALLERY tab, then scroll to the bottom.
Suggested settings: Link Thumbnails to Image File. It works better, especially if you are a paid member and have the lightbox plugin activated. Order Images: Up to you. Gallery Columns, 4 seems to be a great number, but it’s up to you. Once you have made your adjustments, click the INSERT GALLERY button. This will add the gallery to your new page or post. Please note, you will not see the images until you preview the post on your live site.
Step 5: Preview (and Publish) your Gallery
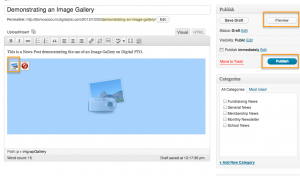 Once you have added the Image Gallery to your page or post, you will want to Preview your work. Click the Preview button to see how it looks. If you are satisfied, you can PUBLISH. If you want to make changes, click on your gallery and then click the photo icon on the top left of the gallery.
Step 6: Enjoy your new Image Gallery
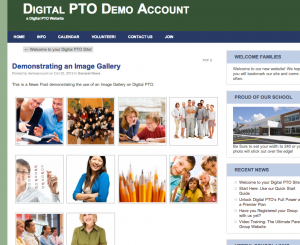 Your Image Gallery should look something like this. If you are a Paid Plan Member, you have the Lightbox plugin that will allow the images to pop-up beautifully when clicked on. You can always go back and add more images, remove images, etc, by clicking on the gallery in the editor and then on the photo icon.


 Are you a Premium Plan member yet? It might be time to get started.



 Need More?
