

How to Log into your Wufoo (Payment Enabled Forms) Account
The majority of the forms on your Digital PTO website are built right into the administrators access, but if you are using payment enabled forms, we provide accounts with a third party service called Wufoo that handles all of the secure transactions and processing of financial data. This tutorial explains how to log into your Wufoo account.
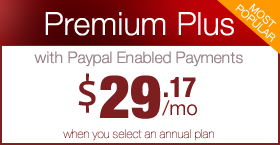
If you have not received a username and password for Wufoo yet, please contact us to let us know. If you are a Premium Plus Member using payment enabled forms, you should have an account, but let us know if that is not the case.
Step 1: Go to Wufoo.com and click LOGIN
 Head to http://www.Wufoo.com and click the LOGIN link.
Step 2: Enter your Email Address and Password
 Enter the Email Address and password you were assigned by the Digital PTO team. The click the LOGIN button.
Step 3: Your Forms Overview

After you are successfully logged in, you will be presented with all of the forms in your account. In most cases, you will only have one form listed, unless you have created custom forms.
Step 4: The Individual Options
 When you hover over a form, a set of options will appear below. Each of these options relates to a specific form.
ENTRIES: Clicking this option will open up the data that has previously been submitted on your form.
EDIT: Clicking this option will allow you to edit, change and modify the form.
VIEW: Clicking this option will open your form in a new window for you to review.
ANALYTICS: This option displays some statistical data about your form.
NOTIFICATIONS: This option allows you to determine where form submissions are sent (typically the main PTA email address)
RULES: This option allows you to create rules (hide and show options) for your form based on the users selections.
PAYMENT: This is where you will integrate your Merchant Account Info as well as determine prices for your form options.
CODE: This option provides the code you need to embed a new or existing form into your Digital PTO website.
PROTECT: This option allows you to password protect your form for testing purposes.
Step 5: How to Duplicate a Form
 If you would like to make an additional copy of your form (not your form data), click the DUPLICATE button and an exact copy of your form will be created that you can edit as needed.
Step 6: How to Delete a Form
 If you want to delete a form, click the DELETE button on the form you wish to delete. CAUTION! Deleting a form also deletes the data that has been submitted! Do not delete a form that has data you want to save or it will be deleted forever. There is NO UNDO for this action.


 Need More Help?


