
How to set up your Premium ‘Volunteer’ form
Your Premium Digital PTO website comes with a number of forms (this varies whether you have selected Premium or Premium Plus). This tutorial will walk you through the quick steps to set up your Volunteer form. The form is already built and installed for you, but you will need to determine where the email notifications are sent as well as which volunteer categories you wish to offer.
Customize Your Options and Settings
Our Premium Volunteer forms are pre-built for you, but you are welcome to customize your form in any way you see fit. We have added a number of default volunteer categories for you, so you will need to review these categories and adjust them according to your school’s needs.
Please feel free to add fields, move things around and change your forms. You can also adjust the email notifications and messages that are sent after forms are submitted.
The tutorial below will cover some of the basics you can adjust. Please see our additional form tutorials to learn some more specific settings.
Want to Download your Data?
Every one of your forms allow for bulk downloading. You can download the entire contents of your form, or specific fields. You can also specify date ranges or everything in the database. Please see our “How to Download Form Data” Tutorial for more information.
Step 1: Click on FORMS under the FORMS Menu
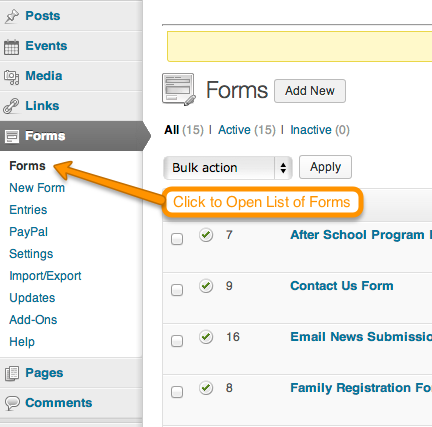 To open up the list of forms available on your website, click the FORMS link under the FORMS Menu.
Step 2: Click the title of the VOLUNTEER INTEREST form
 Click on the title of the VOLUNTEER INTEREST form. When you hover over the title, you can also click EDIT if you prefer. This will open up the form editor.
Step 3: Review the Contact Info Requested

By default, our Volunteer Interest Forms request the following contact information: Name, Email, Home Phone, Cell Phone. If you wish to delete any of these fields (probably phone or cell phone) hover over the field and then click the DELETE button for that particular field. If you are happy with the default fields, proceed to the next step.
Step 4: Open your Volunteer Opportunities list
 We provide about 20 default options for volunteering in order to save you some time. By default, you will only see the first 5 of these options. Click on your volunteer opportunities to see the full list of options available.
Step 5: Edit your Volunteer Opportunities list
 Once you have clicked to open the full list of volunteer opportunities you will see a scrolling list with all of the default options. You are welcome to modify this list to your schools’ specific needs. You can change the names of the options by typing directly over an option you wish to change. You can also delete entire options by clicking on the (-) negative symbol next to any option. If you want to add another option field, click the (+) plus sign.
IMPORTANT: If you have data that has been submitted already to your form and you delete an option, that data is deleted as well. Please use caution when deleting fields on forms that have already been used as you may delete information that has been submitted. If you are brand new, this is not an issue, this only applies to sites that have collected Volunteer Information and are now editing the fields.
Step 6: UPDATE your form
 When you are finished making adjustments and edits to your form, scroll to the bottom of the form and click UPDATE FORM. This will save your changes.
Step 7: Setting up your email notifications
 After you have saved your form options, hover over the FORM SETTINGS link at the top of your form and select NOTIFICATIONS to set up the email address you want your submitted forms sent to. By default, confirmations will be sent to the administrator, so be sure to change this if you want them sent somewhere else.
Step 8: Click EDIT under the Admin Notification Settings
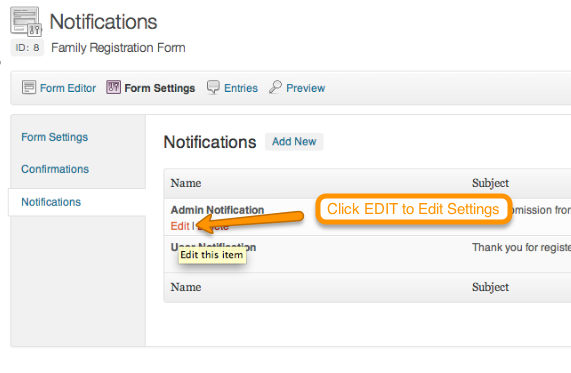 Once the Notifications section comes up you will see either nothing set up yet, an Admin Notification or Both an Admin and User Notification. If you have nothing, click ADD NEW and create an Admin Notification. If you have an Admin Notification set up, click the EDIT link when you hover over the title.
Step 9: Select the SEND TO EMAIL Address
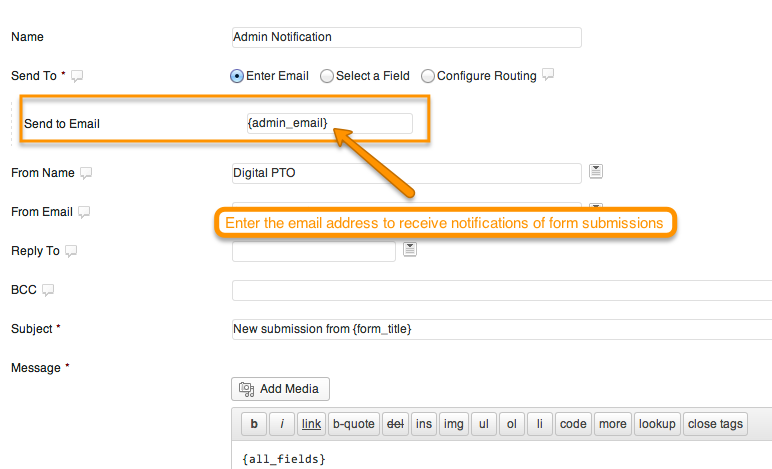 There are three different options available for email addresses for the Admin Notifications. The SEND TO EMAIL is where you will receive the notifications. The FROM EMAIL is who the email is sent from. And the REPLY TO is where a reply will be sent if you hit the REPLY button in your email program. The SEND TO EMAIL should be set to the email address that should receive the emails that a form was submitted on your site. This can be your Parent Groups email address or something different. You can also enter {admin_email} and it will send the email to the Admin Account you have set up with your website. This is the default, but we suggest using a different email address if you have one.
Step 10: Select the FROM EMAIL
 The FROM EMAIL is the address that the email is sent from. We suggest using the email address EMAIL. To set this, click the downward arrow to the right of the field and select the email address. If you haven’t changed your form at all, this will be called Email. Find that field in the drop down and click on it. Now if you reply to the email notification, it will go to the person that submitted the form.
Step 11: Adjust your Notification Message as desired
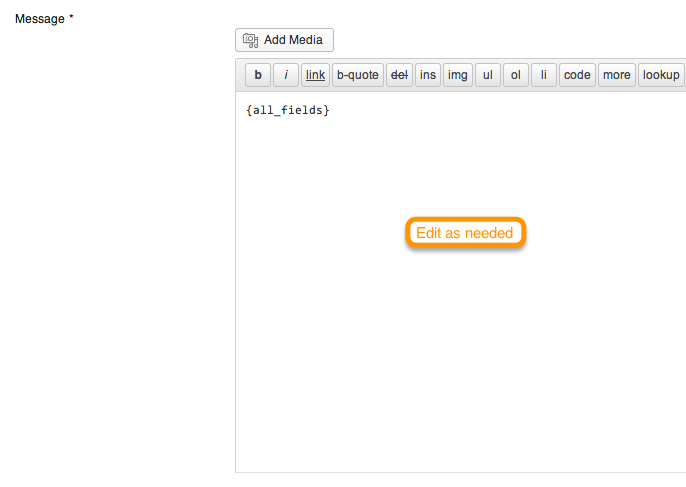 By Default, the notification email will include all the fields that were submitted. If you would like to change that, you can do so in the MESSAGE field. Remember, this is the message that is sent to the Admin, not to the Visitor who filled out the form.
Step 12: Click UPDATE NOTIFICATIONS
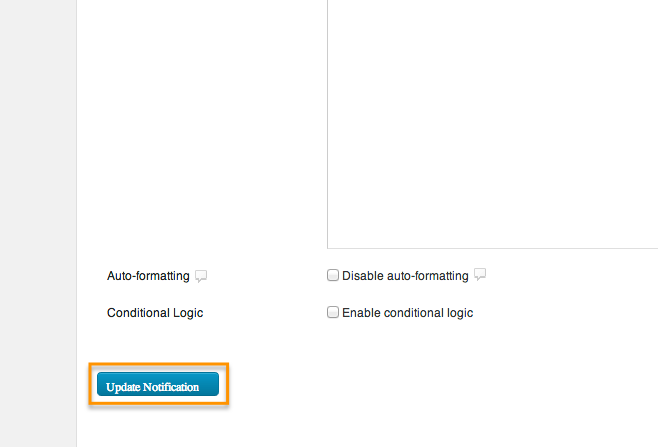 When you have finished making any additional changes to your Admin Notifications, be sure to click UPDATE NOTIFICATION to save your changes. Once the page reloads, you can click on NOTIFICATIONS again if you wish to review additional notifications.
Step 13: Edit / Create the USER NOTIFICATION
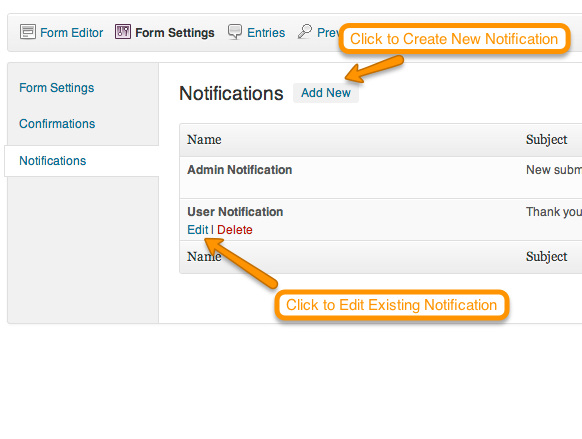 When you return to the Notifications screen, you may also wish to Edit or Create User Notifications. This is the email that a user will receive after they submit your form. If you do not have a User Notification yet, click ADD NEW and create one, if you do have one, click the EDIT link that appears when you hover over the USER NOTIFICATION title.
Step 14: Select the SEND TO Address
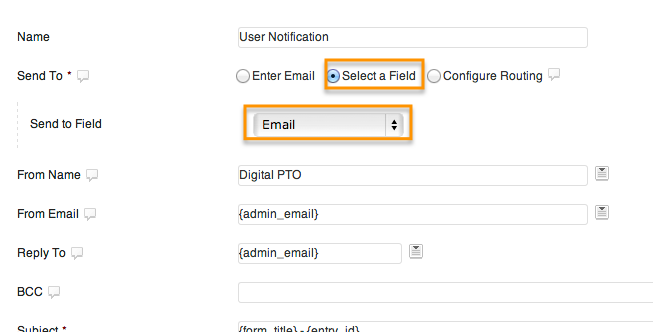 More than likely, you will want to send the confirmation to the user that filled out the form. To do that, you will select SELECT A FIELD from the SEND TO Options and the in the SEND TO FIELD, select the email address field on your form. On the Volunteer form, if you haven’t edited it, it will be called Email. Select that field.
Step 15: Specify From Name, From Email and optional Reply To Email
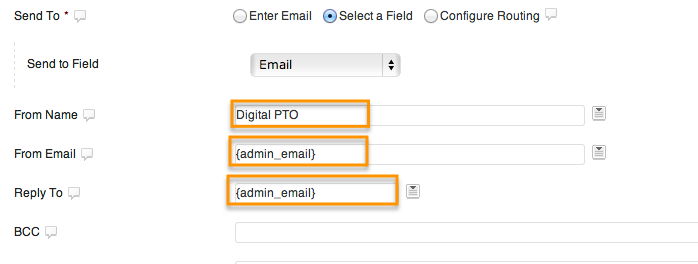 The next step is to set up who you want the email sent from. This will be your Parent Group in most cases. SO, we would suggest entering your Parent Groups Name under the FROM NAME settings, and make the FROM EMAIL either your parent groups email address or you can leave it as {admin_email} and it will come from the admin email on your account. You can also select the REPLY TO email if you want that to be different than who the email is sent from. Most of the time, this doesn’t need to be added.
Step 16: Update the Subject and Message if desired
 The final step in the User Notifications is to update the SUBJECT line and the Message that is sent out if you would like to. You can insert dynamic fields (data the user submitted) if you would like as well. To do this, select the drop down arrow to the right of the fields and select a field (such as First Name, or Family Last Name) and it will insert it for you. Modify the email confirmation to your hearts content.
Step 17: Click UPDATE NOTIFICATIONS
When you have finished making any additional changes to your User Notifications, be sure to click UPDATE NOTIFICATION to save your changes. Once the page reloads, you can click on NOTIFICATIONS again if you wish to review additional notifications.
Step 18: Click on CONFIRMATIONS to Edit Confirmation Screen
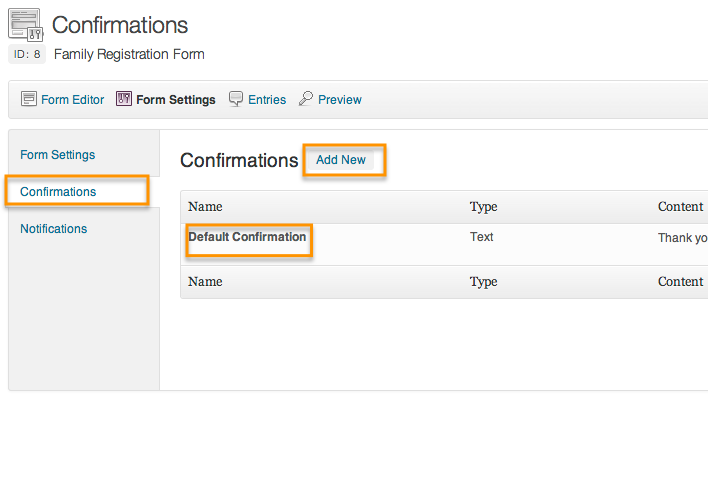 If you would like to edit the message that the user sees on their screen after they submit a form, click on the CONFIRMATIONS tab on the Left Side of the screen. This will take you to a list of Confirmations. Hover over the title of the Default Confirmation to edit it, or click ADD NEW to create a new one.
Step 19: Select either TEXT, PAGE or Redirect
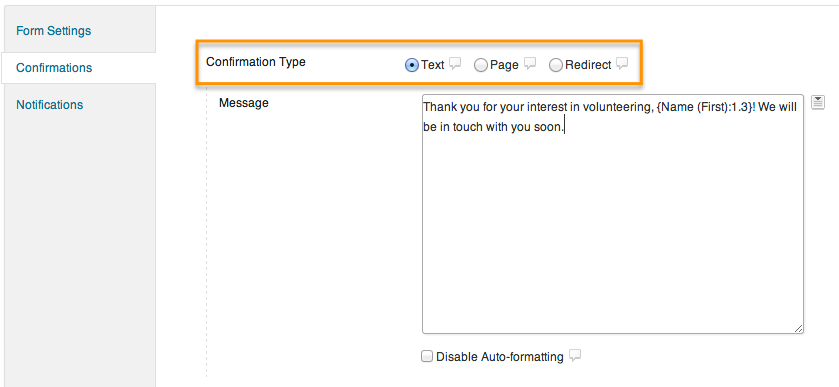 You have three choices for your confirmation screen. This is the screen a user sees after they submit your form. You can display text (the most common), you can send them to a custom page on your website, or you can re-direct them to a page that is not on your website. Typically, we suggest showing Text and will use that as the example. Go ahead and select TEXT for this tutorial.
Step 20: Enter your Confirmation Message
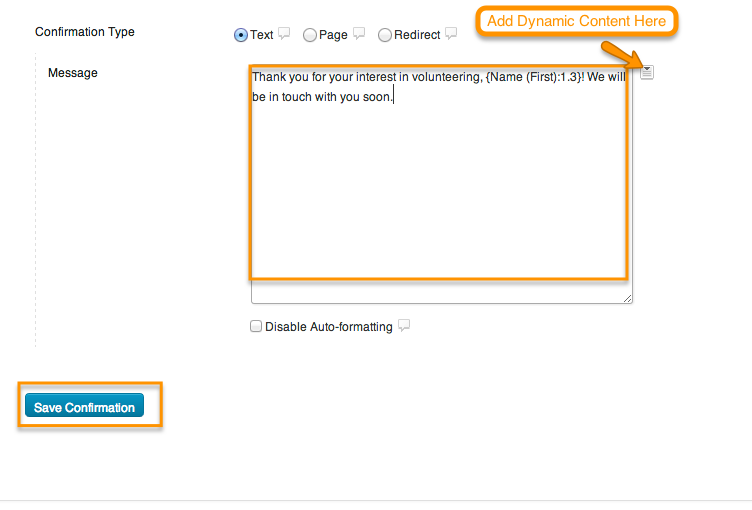 You can type your confirmation in the MESSAGE box. Type whatever makes sense for your group and this particular form. You can add dynamic variables (like First Name) by clicking on the downward arrow to the Right. When you are finished UPDATE or SAVE the content and you are finished! Congrats! You’ve set up your form Completely. There are additional variables and fields available to you and you are welcome to explore the additional options. This tutorial does not cover them all, but covers the most important steps in setting up your forms.


 Need More Help?