

Working with your Forms Email Notifications
Digital PTO offers a wide variety of Pre-Built Forms for our Premium Members. When we install forms on your website, they come ready to go, but you may want to customize certain elements of your form. One of the great areas to customize is your email notifications. These settings will allow you to change where the form submissions are sent, what they say and who gets them. This tutorial is designed to teach you how to modify and adjust your email notifications.
If you are collecting credit card payments directly on your forms you need to refer to the Wufoo Directions for this information.
Step 1: Click on EDIT FORMS under the FORMS Menu
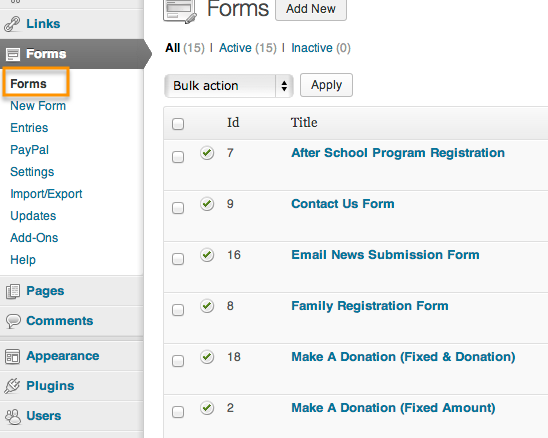 To open up the list of forms available on your website, click the EDIT FORMS link under the FORMS Menu.
Step 2: Click the TITLE of the form you wish to modify
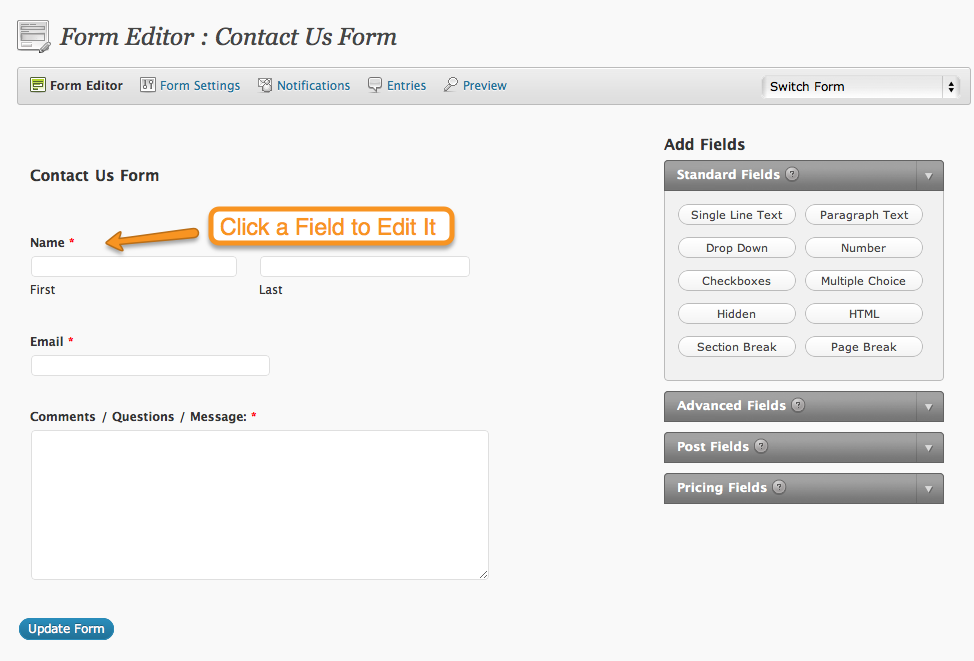
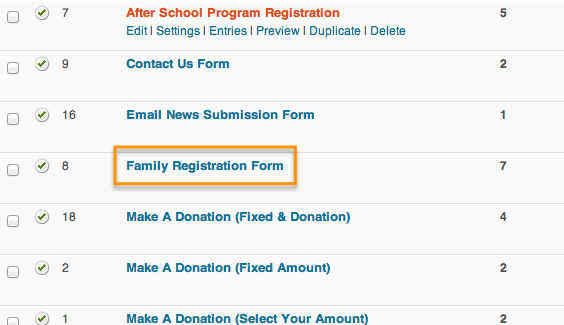 Click the TITLE of the form you wish to set the notifications for.
Notifications for the Administrator
There are two types of email notifications that can be set on each form. First is for the Administrator (that’s you!). These are the emails you will receive when a form is submitted on your website. Second is the notification that can be sent to the user. This is the email that will be sent to the person that submitted the form as a confirmation. Both can be edited individually and turned on and off with the click of a button.
Hover Over Form Settings and Click NOTIFICATIONS
 Under the Form Settings Menu, you will find the NOTIFICATIONS options.
Click EDIT under the Admin Notification Settings
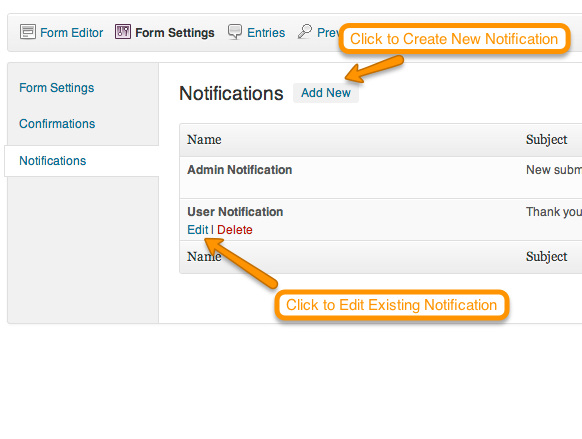
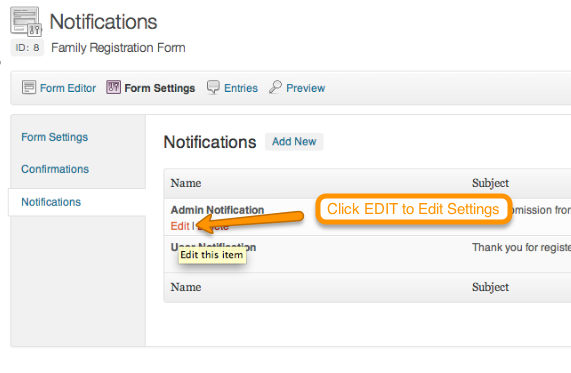 Once the Notifications section comes up you will see either nothing set up yet, an Admin Notification or Both an Admin and User Notification. If you have nothing, click ADD NEW and create an Admin Notification. If you have an Admin Notification set up, click the EDIT link when you hover over the title.
Select the SEND TO EMAIL Address
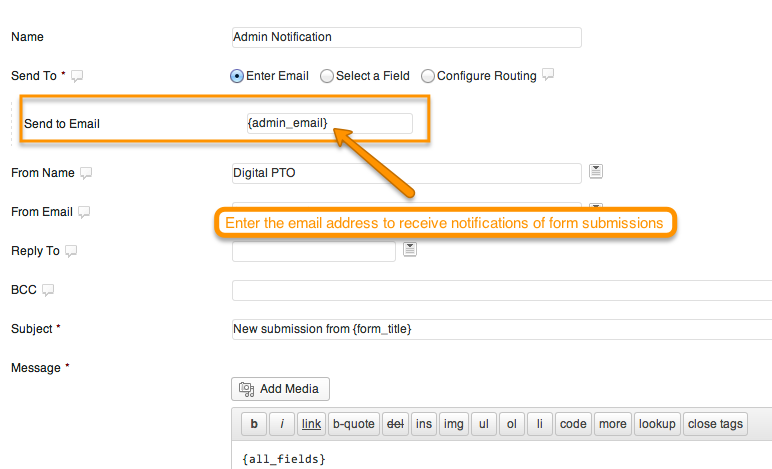 There are three different options available for email addresses for the Admin Notifications. The SEND TO EMAIL is where you will receive the notifications. The FROM EMAIL is who the email is sent from. And the REPLY TO is where a reply will be sent if you hit the REPLY button in your email program. The SEND TO EMAIL should be set to the email address that should receive the emails that a form was submitted on your site. This can be your Parent Groups email address or something different. You can also enter {admin_email} and it will send the email to the Admin Account you have set up with your website. This is the default, but we suggest using a different email address if you have one.
Select the FROM EMAIL
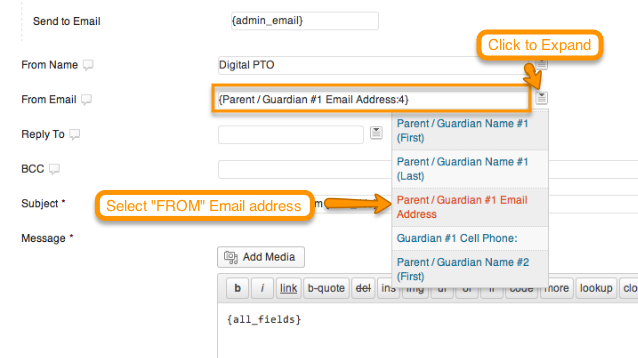 The FROM EMAIL is the address that the email is sent from. We suggest using the email address field for this. To set this, click the downward arrow to the right of the field and select the email address. Find that field in the drop down and click on it. Now if you reply to the email notification, it will go to the person that submitted the form.
Adjust your Notification Message as desired
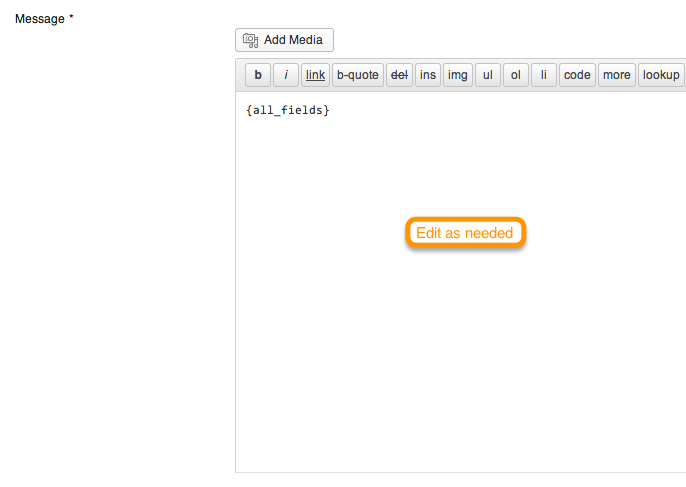 By Default, the notification email will include all the fields that were submitted. If you would like to change that, you can do so in the MESSAGE field. Remember, this is the message that is sent to the Admin, not to the Visitor who filled out the form.
Click UPDATE NOTIFICATIONS
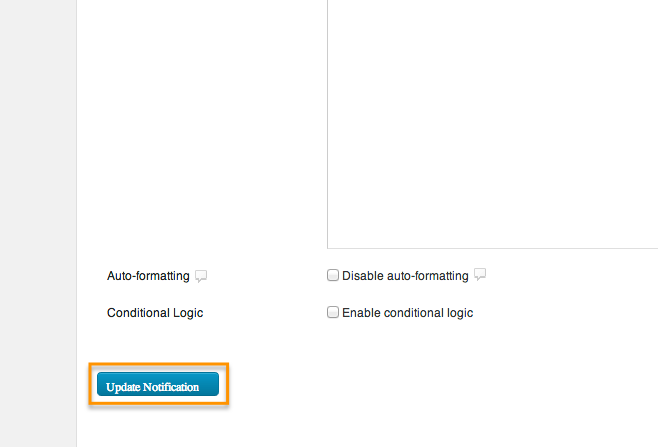 When you have finished making any additional changes to your Admin Notifications, be sure to click UPDATE NOTIFICATION to save your changes. Once the page reloads, you can click on NOTIFICATIONS again if you wish to review additional notifications.
Notifications for the Submitter (User / Visitor)
The sender (submitter) of the form can also receive email notifications. Remember these are the email confirmations that the visitor will receive after submitting a form.
Edit / Create the USER NOTIFICATION
 When you return to the Notifications screen, you may also wish to Edit or Create User Notifications. This is the email that a user will receive after they submit your form. If you do not have a User Notification yet, click ADD NEW and create one, if you do have one, click the EDIT link that appears when you hover over the USER NOTIFICATION title.
Select the SEND TO Address
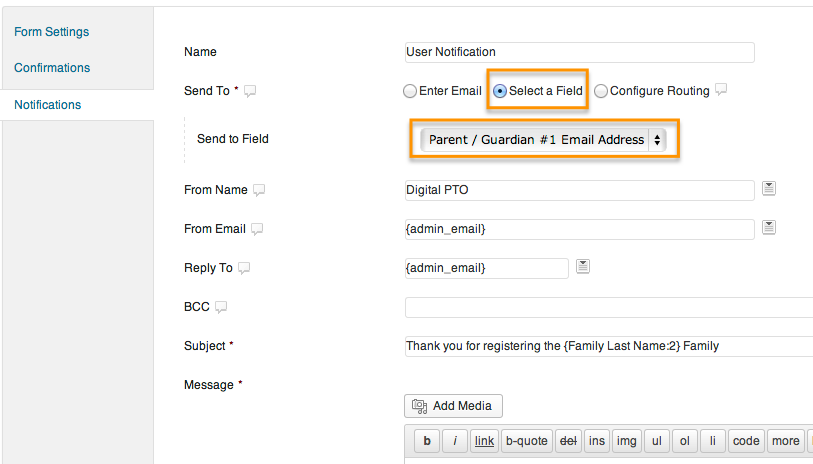 More than likely, you will want to send the confirmation to the user that filled out the form. To do that, you will select SELECT A FIELD from the SEND TO Options and the in the SEND TO FIELD, select the email address field on your form.
Specify From Name, From Email and optional Reply To Email
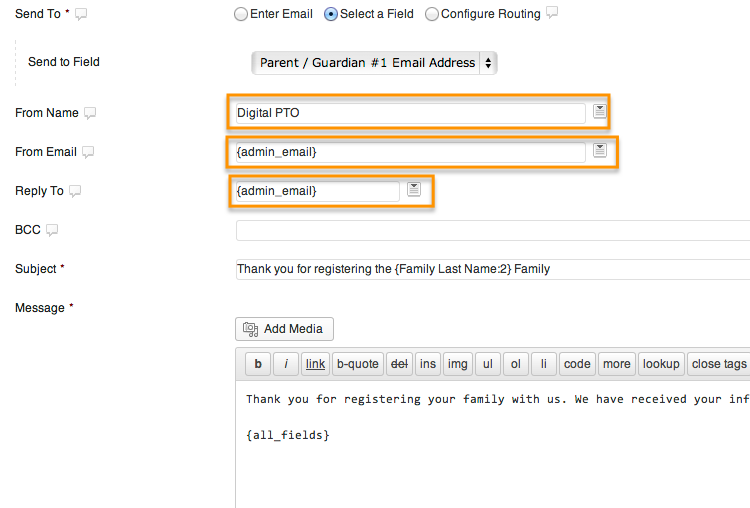 The next step is to set up who you want the email sent from. This will be your Parent Group in most cases. SO, we would suggest entering your Parent Groups Name under the FROM NAME settings, and make the FROM EMAIL either your parent groups email address or you can leave it as {admin_email} and it will come from the admin email on your account. You can also select the REPLY TO email if you want that to be different than who the email is sent from. Most of the time, this doesn’t need to be added.
Update the Subject and Message if desired
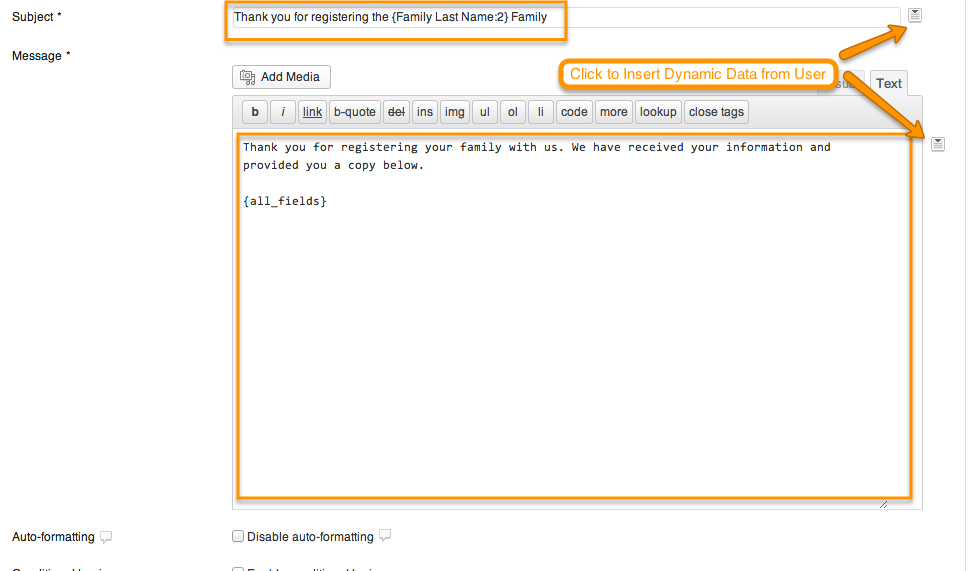 The final step in the User Notifications is to update the SUBJECT line and the Message that is sent out if you would like to. You can insert dynamic fields (data the user submitted) if you would like as well. To do this, select the drop down arrow to the right of the fields and select a field (such as First Name, or Family Last Name) and it will insert it for you. Modify the email confirmation to your hearts content.
Click UPDATE NOTIFICATIONS
When you have finished making any additional changes to your User Notifications, be sure to click UPDATE NOTIFICATION to save your changes. Once the page reloads, you can click on NOTIFICATIONS again if you wish to review additional notifications.
On Screen Confirmations (User / Visitor)
The sender (submitter) of the form will see a message on the screen after they submit their form. This can be edited to your needs.
Click on CONFIRMATIONS to Edit Confirmation Screen
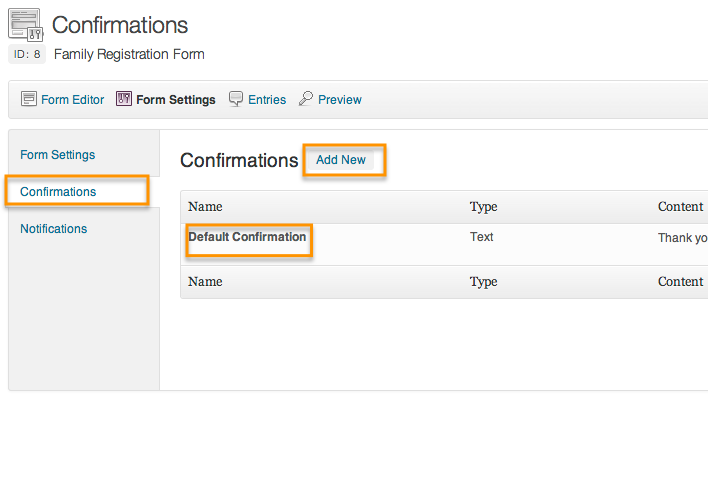 If you would like to edit the message that the user sees on their screen after they submit a form, click on the CONFIRMATIONS tab on the Left Side of the screen. This will take you to a list of Confirmations. Hover over the title of the Default Confirmation to edit it, or click ADD NEW to create a new one.
Select either TEXT, PAGE or Redirect
 You have three choices for your confirmation screen. This is the screen a user sees after they submit your form. You can display text (the most common), you can send them to a custom page on your website, or you can re-direct them to a page that is not on your website. Typically, we suggest showing Text and will use that as the example. Go ahead and select TEXT for this tutorial.
Enter your Confirmation Message
 You can type your confirmation in the MESSAGE box. Type whatever makes sense for your group and this particular form. You can add dynamic variables (like First Name) by clicking on the downward arrow to the Right. When you are finished UPDATE or SAVE the content and you are finished! Congrats! You’ve set up your form Completely. There are additional variables and fields available to you and you are welcome to explore the additional options. This tutorial does not cover them all, but covers the most important steps in setting up your forms.


 Need More Help?

