Use your own Domain Name with Premium Plan Membership
Digital PTO offers the ability to use your own domain name when you are a member of a Premium Plan. This allows your website to be accessed not only from your original address (schoolname.digitalpto.com) but also from a custom domain like yourschoolspta.com. This tutorial will explain the two different ways to use your own domain name.
Please Note: Domain names are registered with a third party and are not a part of Digital PTO. Once you have registered a domain name, we will teach you how to “point” it to us.
If you currently have custom email associated with your Domain Name, please click here for alternate instructions on how to assign only your website to Digital PTO and retain your custom email addresses.
Step 1: Purchasing a Domain Name
If you have not yet registered a domain name for your PTA/PTO, that will be the first step for you. You can use any domain name registrar online, but if you need a suggestion, we like GoDaddy.com.
Please continue to read this before you purchase your domain name. Also, please remember that you do not need to add hosting, we provide that for you at no charge.
Step 2: Setting your DNS Servers (nameservers)
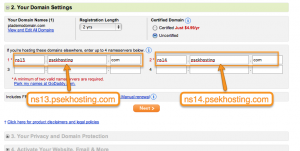
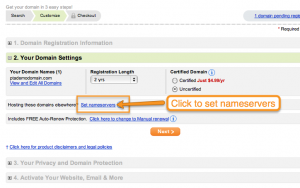
At some point during the registration process, the registrar will ask you if you want to park or host the domain on their servers or if you want to specify (or park) on a different nameserver. The above example shows you how to select a different nameserver with Godaddy. This happens after you enter your contact information.
Step 3: Enter the Digital PTO DNS Server Names
 When you click “Set nameservers” (again using Godaddy as the example, other registrars differ) you will be presented with a page to enter in the nameservers you wish to assign.
Please assign the following nameservers:
ns1.digitalpto.com to your first nameserver
ns2.digitalpto.com to your second nameserver.
You can then continue to register your domain as normal. You DO NOT NEED TO ADD ANY ADDITIONAL SERVICES offered by Godaddy or any other registrar.
Step 4: Complete your Domain name purchase
Finish purchasing your domain name with godaddy or the registrar of your choice.
Step 5: Assign the new domain name to your website
 Once you have purchased your domain name and have set the DNS or nameservers to Digital PTO’s servers, you can enter the URL into your blog’s settings. Expand the TOOLS menu and then click on DOMAIN MAPPING. Once that opens, enter the domain you have purchased in the custom domain field. Be sure to click ADD to save your new domain name.
Step 6: Complete the Domain Assignment Form
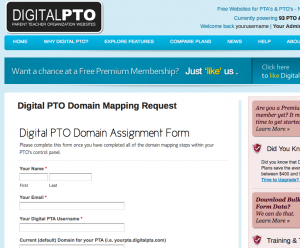
Once you have completed all of the steps above, the final step is to fill out the Domain Assignment Request form. This will notify us that you are ready for us to add your domain on the back end of our servers. Go ahead and FILL OUT THIS FORM and you are all set.
Do you already own the domain name you want to use?
No problem! Go ahead and log into your registrar’s account to manage your domains. From there find the option to Manage DNS servers or Manage NameServers and follow the instructions from Step 3 on down.


 Need More Help?


